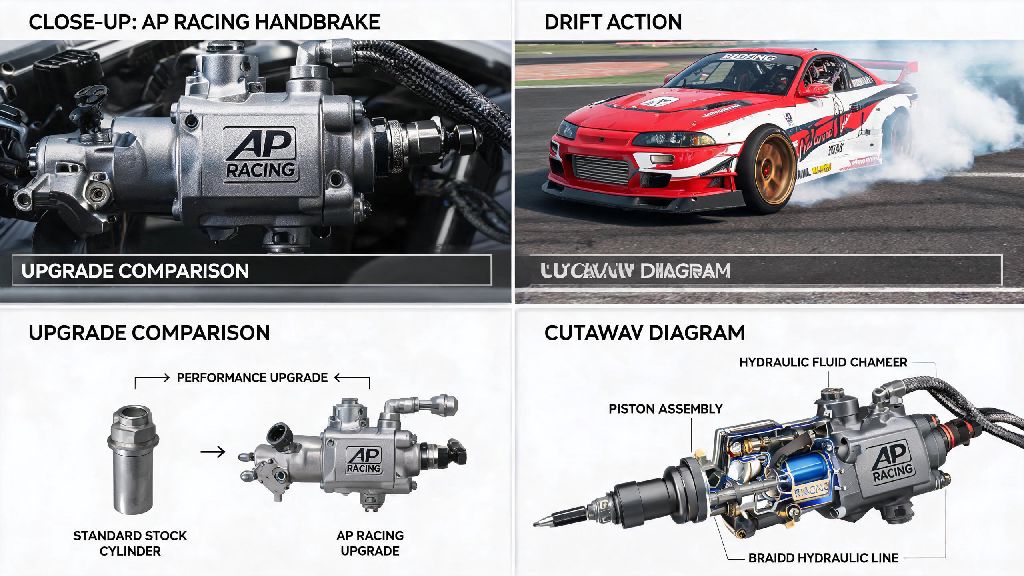
If you’ve ever locked up your rear tires mid-drift or missed a braking marker on the track because your handbrake felt spongy, you know how critical a reliable hydraulic handbrake setup is. I’ve spent years tuning drift and time attack cars for local and regional race series, and one part I never cut corners on is the ap racing handbrake master cylinder. It’s built to handle repeated hard use without fading, and it delivers the consistent bite you need to pull off clean maneuvers or stop quickly when things go sideways. But picking the right size, installing it correctly, and maintaining it takes a bit of know-how to get right, and that’s exactly what we’re covering here today. You don’t need to be a professional mechanic to get this right, but there are a few key details that separate a solid setup from one that leaves you stranded in the paddock.
Key Benefits of Upgrading to an AP Racing Handbrake Master Cylinder
Plenty of cheap hydraulic handbrake master cylinders are available online, but they rarely hold up to the stress of regular racing use. AP Racing has been making performance braking components for professional motorsports for decades, so their parts are tested under the harshest conditions possible. Precision machined aluminum construction means the housing won’t flex under high pressure, so every pound of force you put on the handbrake lever translates directly to stopping power at the rear wheels. I tested a generic $50 master cylinder on my drift build a few years back, and the housing flexed so much under hard pulls that I could never get a firm, consistent feel. Consistent fluid displacement is another huge benefit, even after 20+ hard pulls in a single run, you won’t notice any drop in pressure or spongy feel that could throw off your line. Seal durability is also a big selling point. Cheap units often use low-quality rubber seals that break down after a few months of exposure to high heat and brake fluid, leading to leaks and sudden loss of pressure. I’ve run my current AP master cylinder for three full seasons of drift events without a single leak or seal failure, even on 90-degree summer days when brake components get hot enough to burn you if you touch them. It’s not the cheapest option on the market, but the peace of mind it gives you when you’re pushing your car to the limit is worth every penny.
How to Pick the Correct Bore Size for Your Build
Picking the right bore size is the most important decision you’ll make when buying your master cylinder, and it’s one a lot of new builders get wrong. Bore size directly impacts how much hydraulic pressure you get per pull, and how far you have to move the handbrake lever to engage the brakes. Smaller bore sizes generate more pressure for the same amount of force, but they require a longer lever throw to move enough fluid to engage the brakes. Larger bore sizes move more fluid per stroke, so you get a shorter throw, but you need more hand strength to get the same amount of stopping pressure. For drift cars running single rear caliper handbrakes, a 0.625” bore is usually the sweet spot, it gives enough pressure to lock the rears with minimal force, and the throw is short enough that you don’t have to reach far to pull it mid-maneuver. For track cars running dual rear calipers or larger 330mm+ rear rotors, you may want to step up to a 0.7” bore to get enough fluid volume to engage both calipers evenly. You don’t have to guess what size works for your build, either. Most local race shops will let you test different setups from other racers in your series to see what feels right for your hand strength and driving style. Just make sure you pick a master cylinder that matches your handbrake lever mount style, AP sells both push and pull style units to fit most aftermarket lever setups, so you won’t have to modify your existing mounting bracket if you buy the right one.
Common Installation Mistakes to Avoid
Even the best master cylinder in the world won’t perform well if you install it wrong. I’ve seen dozens of builders spend $200+ on an AP unit, then make simple mistakes that leave them with a spongy, unreliable handbrake. Some of these mistakes are small enough that you won’t notice them until you’re mid-run, which can lead to dangerous situations on track. The most common mistakes I see are:
I’ve seen all of these mistakes happen at local track days, even with experienced builders who have been working on race cars for years. Always mount the master cylinder level to prevent air buildup, and use DOT 4 or DOT 5.1 brake fluid rated for at least 500 degrees Fahrenheit dry boiling point if you’re running hard on track. If you’re not confident bleeding the system yourself, ask a fellow racer or local performance shop to help you out, it’s worth the extra 30 minutes of work to get a firm, consistent pull every time. You should also test the handbrake at low speed in the paddock before you head out on track, to make sure it engages correctly and there are no leaks around the fittings.
Simple Maintenance Tips to Extend Its Lifespan
Even the best AP Racing parts don’t last forever if you don’t take care of them, but a little regular maintenance will make your master cylinder last for years longer than a cheap, unmaintained unit. You don’t need any special tools to do most of this maintenance, either, it takes less than 10 minutes before every race weekend. First, check the fluid level in the master cylinder reservoir every time you head to the track, top it off if it’s low, and look for any signs of leaks around the seals or fittings. If you notice fluid dripping down the side of the housing, you probably need to replace the internal seals before you run the car again. Flush your entire brake system every 3 to 6 months depending on how often you race, old brake fluid absorbs moisture from the air over time, which lowers its boiling point and can corrode the internal metal parts of the master cylinder. If you notice your handbrake pull feels spongy even after bleeding the entire system, it’s probably time to replace the internal seals. AP sells affordable rebuild kits for all their master cylinders, so you don’t have to buy a whole new unit if the seals wear out. If you drive your race car on the street occasionally, make sure you don’t leave the handbrake pulled up for long periods in cold weather, as the moisture in the brake fluid can freeze and cause the seals to stick, leading to drag on the rear brakes when you start driving.
At the end of the day, upgrading your braking system is one of the best investments you can make for any race build, and the ap racing handbrake master cylinder is a reliable, high-performance option that will serve you well for years if you pick the right size, install it correctly, and keep up with basic maintenance. I’ve run these on 4 different race builds over the last 7 years, and I’ve never had one fail on me mid-session, which is more than I can say for most cheaper alternatives. Take the time to do your research before you buy, ask other racers in your series what setup they run, and don’t rush the installation process. You’ll end up with a handbrake that feels consistent every time you pull it, no matter how hard you push your car on track or on the drift course.