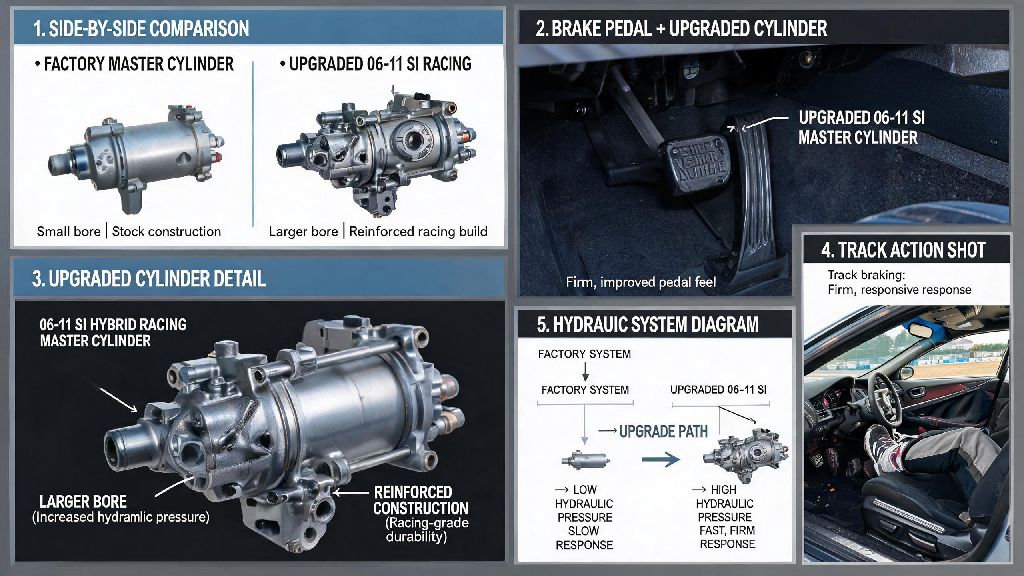
I’ve owned my 8th generation Honda Si for 9 years now, and I’ve gone through just about every brake upgrade you can think of to fix that mushy factory pedal feel that plagues so many of these cars. I tried high-performance brake pads, slotted rotors, even braided steel lines, and none of them fixed the issue of my brakes fading halfway through a 20-minute track session. It wasn’t until I installed an 06-11 si hybrid racing master cylinder that I finally got the consistent, firm brake feel I’d been chasing for years.
What Makes the 06-11 Si Hybrid Racing Master Cylinder Worth the Investment?
First, let’s talk about why the factory master cylinder falls short for anyone who pushes their Si even a little bit hard. The stock unit uses a small 13/16 inch bore, which doesn’t generate enough hydraulic pressure to properly feed upgraded brake calipers, even if you keep the factory calipers and just install performance pads. It’s also made from cast metal with cheap rubber seals that break down quickly when exposed to high heat from repeated hard braking.
The hybrid racing unit fixes all these pain points with a few key design upgrades. It comes with a 15/16 inch bore size that increases hydraulic pressure by roughly 22% compared to the stock pump, so you get way more stopping power with far less pedal travel. The entire body is made from hard-anodized 6061 aluminum, which is far more resistant to heat and corrosion than the factory cast unit, so it won’t warp or leak even after dozens of track days. The seals are made from high-temperature EPDM rubber that can handle temperatures up to 500 degrees Fahrenheit, which eliminates the risk of seal failure during long, hard driving sessions.
It’s not a perfect upgrade, though. The biggest downside is that it costs roughly twice as much as a replacement OEM master cylinder. You also have to adjust the pushrod length during installation, which isn’t required for a stock replacement, so it’s a little more labor intensive if you’re doing the work yourself. But for anyone who uses their Si for more than just commuting, the tradeoff is more than worth it.
Step-by-Step Pre-Install Checks You Can’t Skip
I made a lot of mistakes the first time I installed one of these units, so I’ve put together a list of pre-install checks that will save you hours of frustration and keep you from having to redo the job halfway through. You don’t need any specialty tools for these steps, just a tape measure, a drain pan, and a friend who can help you with bleeding later on.
Most people skip the pushrod length measurement step and just guess at the right length, and that’s the number one cause of issues with this upgrade. If the pushrod is too long, your brakes will be partially engaged at all times, which will wear out your pads in a few hundred miles and can even cause brake failure if they overheat badly enough. If it’s too short, you’ll have a ton of dead travel at the top of your brake pedal, and you won’t get the firm feel you’re looking for.
Common Tuning Mistakes to Avoid With Your New Brake Master Cylinder
Even if you get the installation right, there are a few common tuning mistakes that will keep you from getting the full performance benefit of your new master cylinder. I’ve seen all of these happen to friends at track days, so I can tell you first hand how frustrating they are to fix when you’re supposed to be out driving.
The first mistake is skipping a full brake system flush when you install the new pump. Even if you drained the reservoir, there’s still old, contaminated brake fluid in your lines and calipers that has a lower boiling point than fresh fluid. If you don’t flush the entire system, you’ll still get heat fade when you push the car hard, and you’ll probably end up with air pockets in the lines that make your pedal feel mushy.
Another common mistake is assuming the master cylinder alone will fix all your brake issues. If you’re still running cheap, low-performance brake pads and stock rotors, you won’t notice nearly as big of a difference. The master cylinder increases pressure to your brakes, but you still need pads that can grip the rotors properly under high heat to get maximum stopping power. You don’t have to buy the most expensive pads on the market, but at least step up to a street-performance pad that’s rated for temperatures above 800 degrees Fahrenheit.
People who run their cars on the track also often forget to adjust their brake bias after installing the new master cylinder. The increased front brake pressure can make your car push wide through corners if you don’t reduce front bias slightly, which can be dangerous if you’re not expecting it. You don’t need a fancy brake bias controller if you’re a casual track day driver, but adjusting the proportioning valve a half turn at a time until you get balanced braking will make a huge difference in how your car handles under hard braking.
Real-World Performance Results for Street and Track Use
I’ve run this master cylinder on my Si for both daily commuting and regular track days for the past 3 years, so I can give you a honest breakdown of how it performs in both scenarios. For daily street use, the biggest difference is the lack of dead travel at the top of the brake pedal. With the stock master cylinder, I had to press the pedal down almost 2 inches before I got any stopping power, which made it hard to make smooth stops in traffic. Now I get firm, predictable braking as soon as I touch the pedal, which makes driving in stop-and-go traffic way less stressful, and it gives me more confidence when I have to stop suddenly to avoid a collision.
On the track, the difference is even more noticeable. Before I installed the hybrid racing master cylinder, I’d start to feel serious brake fade after 3 or 4 hard laps, and I’d have to let off the throttle earlier to make sure I could stop for corners. Now I can run full 20-minute sessions without any noticeable fade, and the pedal feel stays consistent the entire time. I’ve even shaved 1.2 seconds off my personal best lap time at my local road course just from this upgrade, since I can brake later and harder into every corner.
That doesn’t mean this upgrade is for everyone, though. If you only use your Si for commuting and you never push it hard, you probably won’t notice enough of a difference to justify the cost. It also doesn’t play well with extremely large brake calipers designed for 6-piston setups, as the bore size isn’t quite big enough to feed those properly. But for 90% of Si owners who do a mix of street driving and occasional track days, it’s one of the best performance upgrades you can buy for under $300.
At the end of the day, upgrading to an 06-11 si hybrid racing master cylinder is one of the most impactful changes you can make to your 8th gen Si’s braking system, as long as you take the time to install it correctly and avoid the common tuning mistakes I covered earlier. It’s not a magic fix for every brake issue, but if you’re tired of mushy pedal feel and inconsistent stopping power when you push your car hard, it’s worth every penny. If you’re planning the install yourself, just remember to double check your pushrod length, flush the entire system with high-quality brake fluid, and take the time to test your brakes carefully before you hit the road or the track.