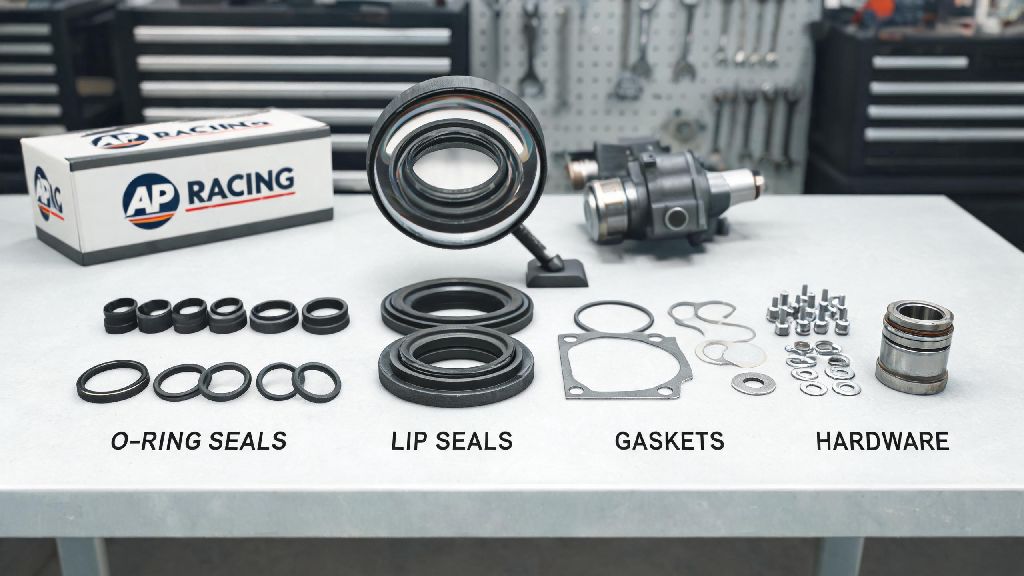
If you’ve ever felt a soft, spongy brake pedal halfway through a track session, you know how terrifying that split second of uncertainty feels. I had that exact experience last season at a local time attack event, and after pulling into the pits, I found my AP Racing master cylinder’s internal seals had degraded from repeated heat exposure. Replacing the entire unit would have cost me over $300, but picking up a genuine AP racing master cylinder repair kit let me fix the issue for less than a third of that price, and my brakes felt better than new after the install. Over the years I’ve worked on dozens of performance brake setups, and I’ve learned that cutting corners on these repair parts is one of the riskiest mistakes a racer or track day enthusiast can make.
Key Components to Inspect in Your AP Racing Master Cylinder Repair Kit Before Installation
Not all repair kits are created equal, and knockoff options that look identical to genuine AP parts can fail in a matter of weeks if they’re made with low-quality materials. I’ve seen generic kits start leaking after just three track days, because their seals aren’t formulated to stand up to the high heat and pressure of performance braking. Before you even take your master cylinder apart, lay out all the parts from your kit and confirm you have every piece you need to complete the job without interruption.
If any parts are missing or look misformed, reach out to your supplier immediately instead of trying to make do with old components from your original master cylinder. It’s not worth risking your safety on track to save a few days of wait time for a replacement kit. If you’re new to working on AP brake systems, you can cross reference the included parts list with official AP documentation to make sure everything matches your unit’s requirements.
Step-by-Step Installation Tips for Long-Lasting Brake Performance
Even the highest quality repair kit will fail if you install it incorrectly, so take your time and work in a clean, dust-free space to avoid getting debris inside the master cylinder bore. First, disconnect your brake lines from the master cylinder and drain all old brake fluid out of the system completely. Old, contaminated fluid has tiny metal particles that can tear your new seals even before you hit the track.
Next, use a soft, lint-free cloth to wipe out the inside of the master cylinder bore. Don’t use any harsh cleaning chemicals, as they can leave behind residue that breaks down the new seals. Lightly coat all new seals and o-rings with fresh brake fluid before sliding them into place, to prevent them from tearing during installation. If you force a dry seal into the bore, you’ll almost certainly create a tiny tear that will leak later on.
Once you’ve reassembled the master cylinder, bench bleed it before you mount it back in your car. This removes all trapped air from the internal components, so you don’t have to spend extra time bleeding the entire brake system later. I always bench bleed twice to make sure no tiny air bubbles are left hiding in the lines. After mounting the unit, bleed the rest of your brake system starting from the caliper farthest from the master cylinder, working your way closer to finish the job.
Common Mistakes to Avoid When Working With Your Brake Master Cylinder Repair Kit
I’ve watched a lot of enthusiasts run into preventable issues with their brake repairs, and most of the mistakes come from rushing the job or cutting corners to save time. One of the most common errors is reusing old brake fluid after installing the new kit. Old fluid absorbs moisture over time, which lowers its boiling point and can cause your brakes to fade under heavy track use. Always flush the entire system with fresh, high-performance brake fluid when you install your repair kit.
Another mistake is using the wrong size kit for your master cylinder. AP makes master cylinders in a range of bore sizes for different vehicle setups, and a kit made for a 0.75” bore won’t work for a 1” bore unit, even if the seals look the same size. Double check your master cylinder’s part number before ordering your kit to make sure you get the right fit. I always write the part number on the side of my master cylinder with a paint marker after I install it, so I don’t have to look it up later if I need a replacement.
Don’t skip post-installation testing either. After you bleed the entire brake system, pump the brakes hard 10 to 15 times while the car is parked, and check around the master cylinder for any signs of leaks. If you see even a tiny drop of fluid, take it apart again and fix the issue before you drive the car, let alone take it on track. Brake issues don’t get better over time – they only get more dangerous the more you drive. I learned this lesson the hard way early in my racing career, when a small leak I ignored turned into total brake failure on the second lap of a race.
How to Tell When It’s Time to Replace Your Kit (Instead of Reusing Seals)
A lot of people ask me if they can just re-seal their master cylinder once and be done with it, but the truth is that even the best seals wear out over time, especially if you drive on track regularly. You should inspect your master cylinder at least once every 3 track days, or every 6 months if you only drive your performance car on the street. Catching wear early will prevent you from dealing with a catastrophic failure when you’re pushing your car to its limits.
Signs that you need a new repair kit include a spongy brake pedal that doesn’t firm up after bleeding, visible leaks around the master cylinder mounting point, or a brake pedal that sinks to the floor when you hold pressure on it. If you notice any of these signs, don’t wait to order a replacement kit – waiting even one more track day could lead to total brake failure. I keep a spare kit in my track tool bag at all times, so I can fix an issue on site if I run into a problem during an event.
You should also replace your repair kit every 2 years even if you don’t notice any issues, because rubber seals break down over time even if they’re not being used heavily. This regular replacement schedule will save you from unexpected issues down the line, and it’s far cheaper than replacing an entire master cylinder or repairing damage from a crash caused by brake failure. If you live in a humid climate, you may want to shorten that timeline to 18 months, since extra moisture in the air speeds up seal degradation and brake fluid contamination.
Your brake system is the most important safety component on your track or street performance car, and cutting corners on repair parts is never a smart tradeoff. Investing in a genuine AP racing master cylinder repair kit when you first notice signs of seal wear will save you money, keep you safe on track, and keep your brakes performing consistently for dozens of sessions to come. Take your time with the installation, avoid common mistakes, and inspect your system regularly, and you won’t have to worry about unexpected brake failure when you’re pushing your car to its limits.